
Phenomena Creator Tool Documentation
The Phenomena Creator Tool (PCT) is the authoring application for creating Phenomena Experiences. The goal of the PCT is to provide a low barrier of entry for new creators, while providing robust functionality for experienced creators.

The center panel is where the fun starts. Creators can draw shapes, lines, and text on the canvas. After adding functionality to the objects in the scene (using the Code Editor), creators can test their Experience with the play button in the top right corner of the center panel.
Objects
Creators can view the list of objects in the scene by selecting the Objects tab. Objects can be reordered and deleted from this pane. The order of the list determines which objects appear in front of others in the scene.
Note: If you are editing a symbol, the Objects tab will only display the objects in that symbol. Click the home button to return to the main scene.

Graphics
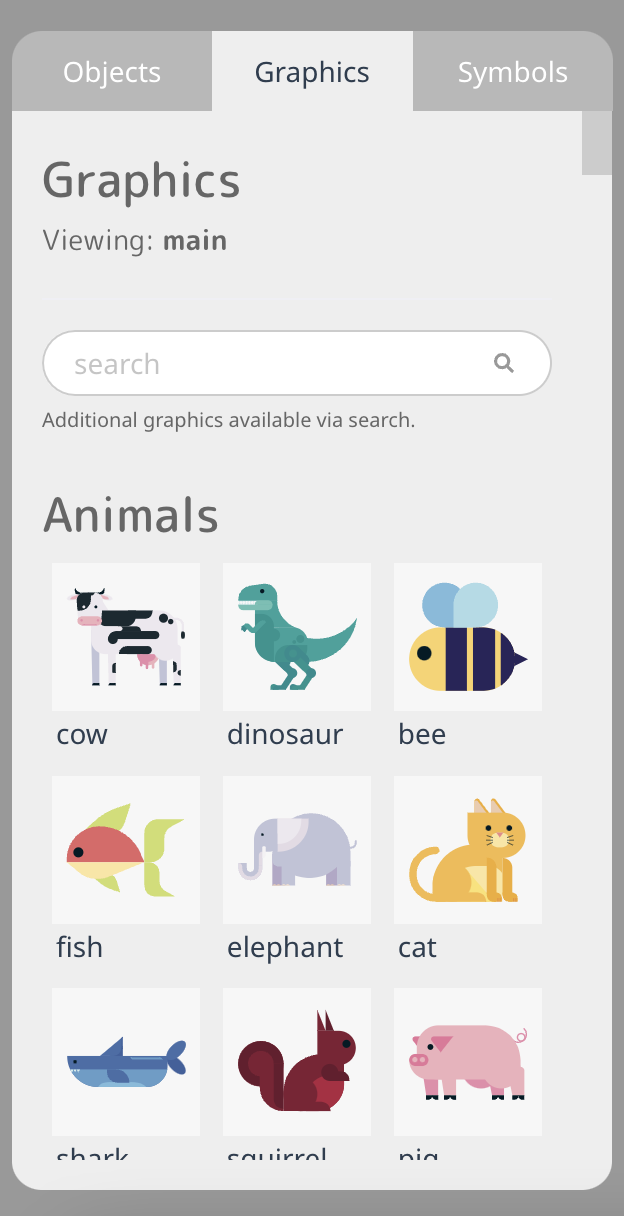
Creators can click and drag images onto the center canvas from the Graphics tab. In addition to the official Phenomena Graphics Library, creators can also browse and add emojis by using the search bar.
Properties
In the right pane, creators can view and edit the properties of a selected object. Default properties of objects include position, width/height, color, etc.

Custom Properties
In addition to the default properties of objects, creators can add their own custom properties. At the bottom of the Properties pane, there is a button set to add a custom property. Select the type of property you want to add (whether it’s a number, string (or text), boolean (true/false), or color), then hit “Add property”.

You can edit the name of the custom property by double clicking on the name. Hit enter to save the new name of the property.
What can you use custom properties for? Say you want to create an Experience on slope intercept. In your graph object, you can add two custom number properties: “m” for slope and “b” for y-intercept. Then in the Code Editor, you can reference the value of these two custom properties to graph the line. This opens up a world of possibilities, as properties can be changed through interactive elements like sliders and buttons. Custom properties hooked up to interactive elements are the key to creating dynamic, interactive systems. See also Adding Interactive Controls and Code Editor Basics.
Properties of Frames and Symbols
Objects have properties, but so do frames and symbols! You can add custom properties to them like you would with objects. Frame properties can be viewed by clicking on an empty space in the center canvas, and symbol properties can be viewed by clicking on a symbol’s pencil icon in the Symbols tab, then selecting “Edit symbol”.
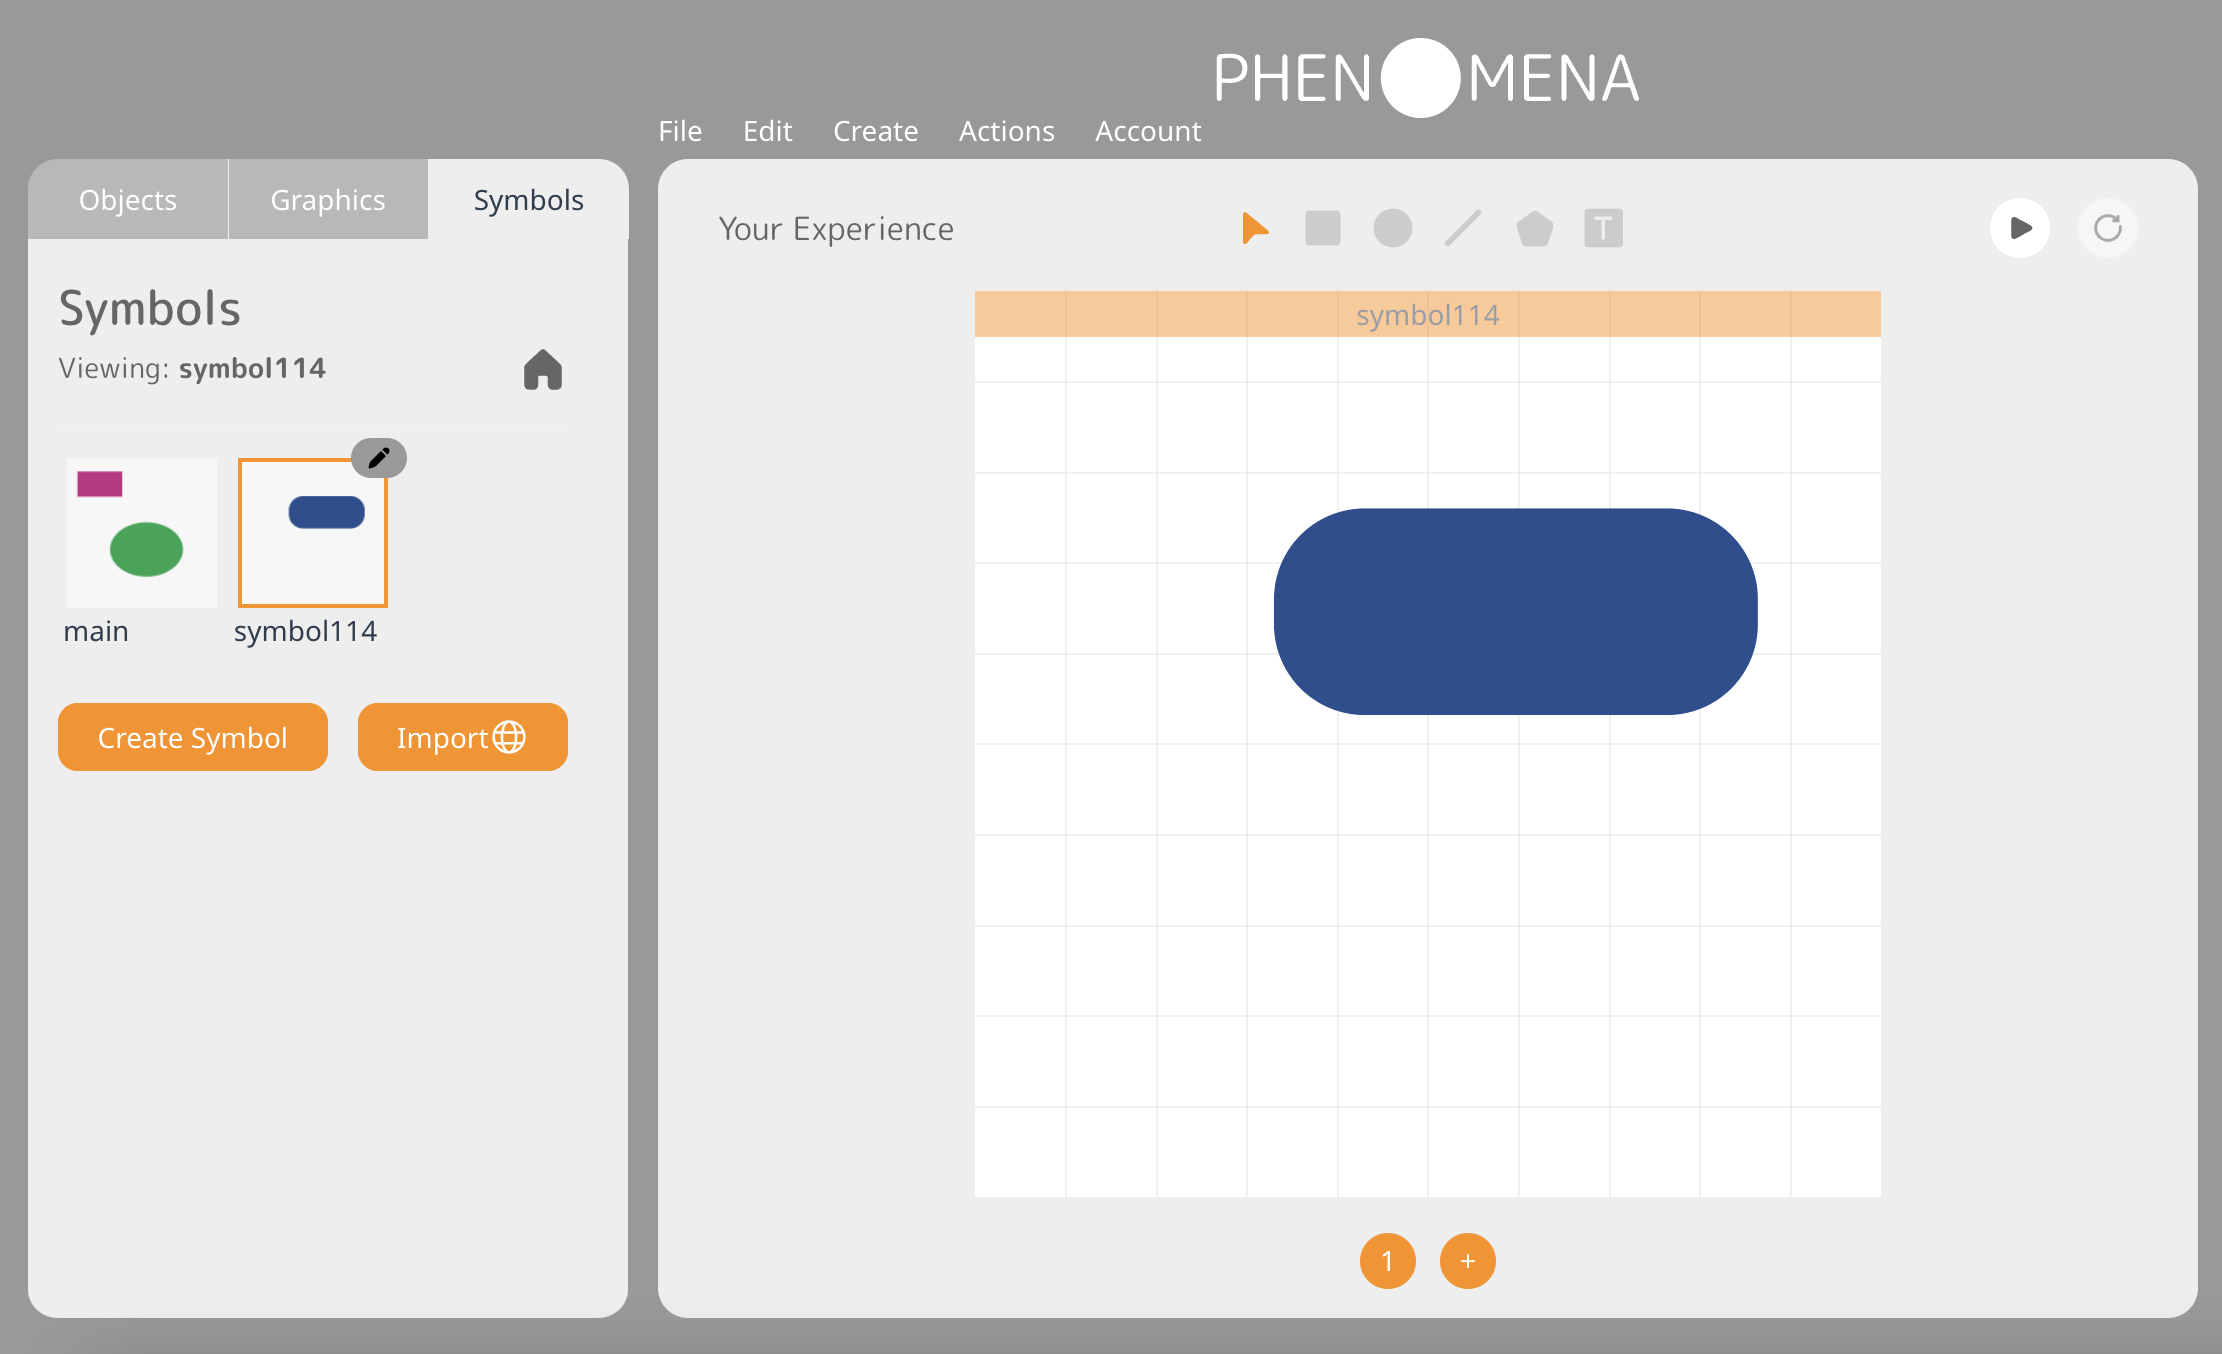
Symbols
Symbols may seem confusing at first, but they open up a new world of functionality. Simply put, a symbol is a container for objects and code that can be added to any frame. Symbols are great for grouping objects together. They are also wonderful when you need to reuse code or graphics across multiple frames.
Creating a Symbol
Navigate to the Symbols tab and hit “Create Symbol”. The center will become blank and indicate that you are editing a symbol. Once you’ve created a symbol, you can add objects, edit properties, and write code just like you would in the main scene. See also: Coding With Symbols.
Adding a Symbol to the Main Scene
Return to the main scene using the home button in the left pane. You can add an instance of your custom symbol to the main scene by simply clicking and dragging onto the center canvas. You can add as many symbol instances as you like across all the frames of your main scene.
Editing a Symbol
To make changes to a symbol, first navigate to the Symbols pane. Select the symbol by either double-clicking on it or hitting the pencil icon, then “Edit symbol”. Note that any edits to the symbol will apply to each of its symbol instances across the main scene. This ability to make changes across all symbol instances is what makes symbols so powerful.
Renaming a Symbol
To rename a symbol, navigate to the Symbols pane and double click on the label below the symbol. Hit enter to save the name change.


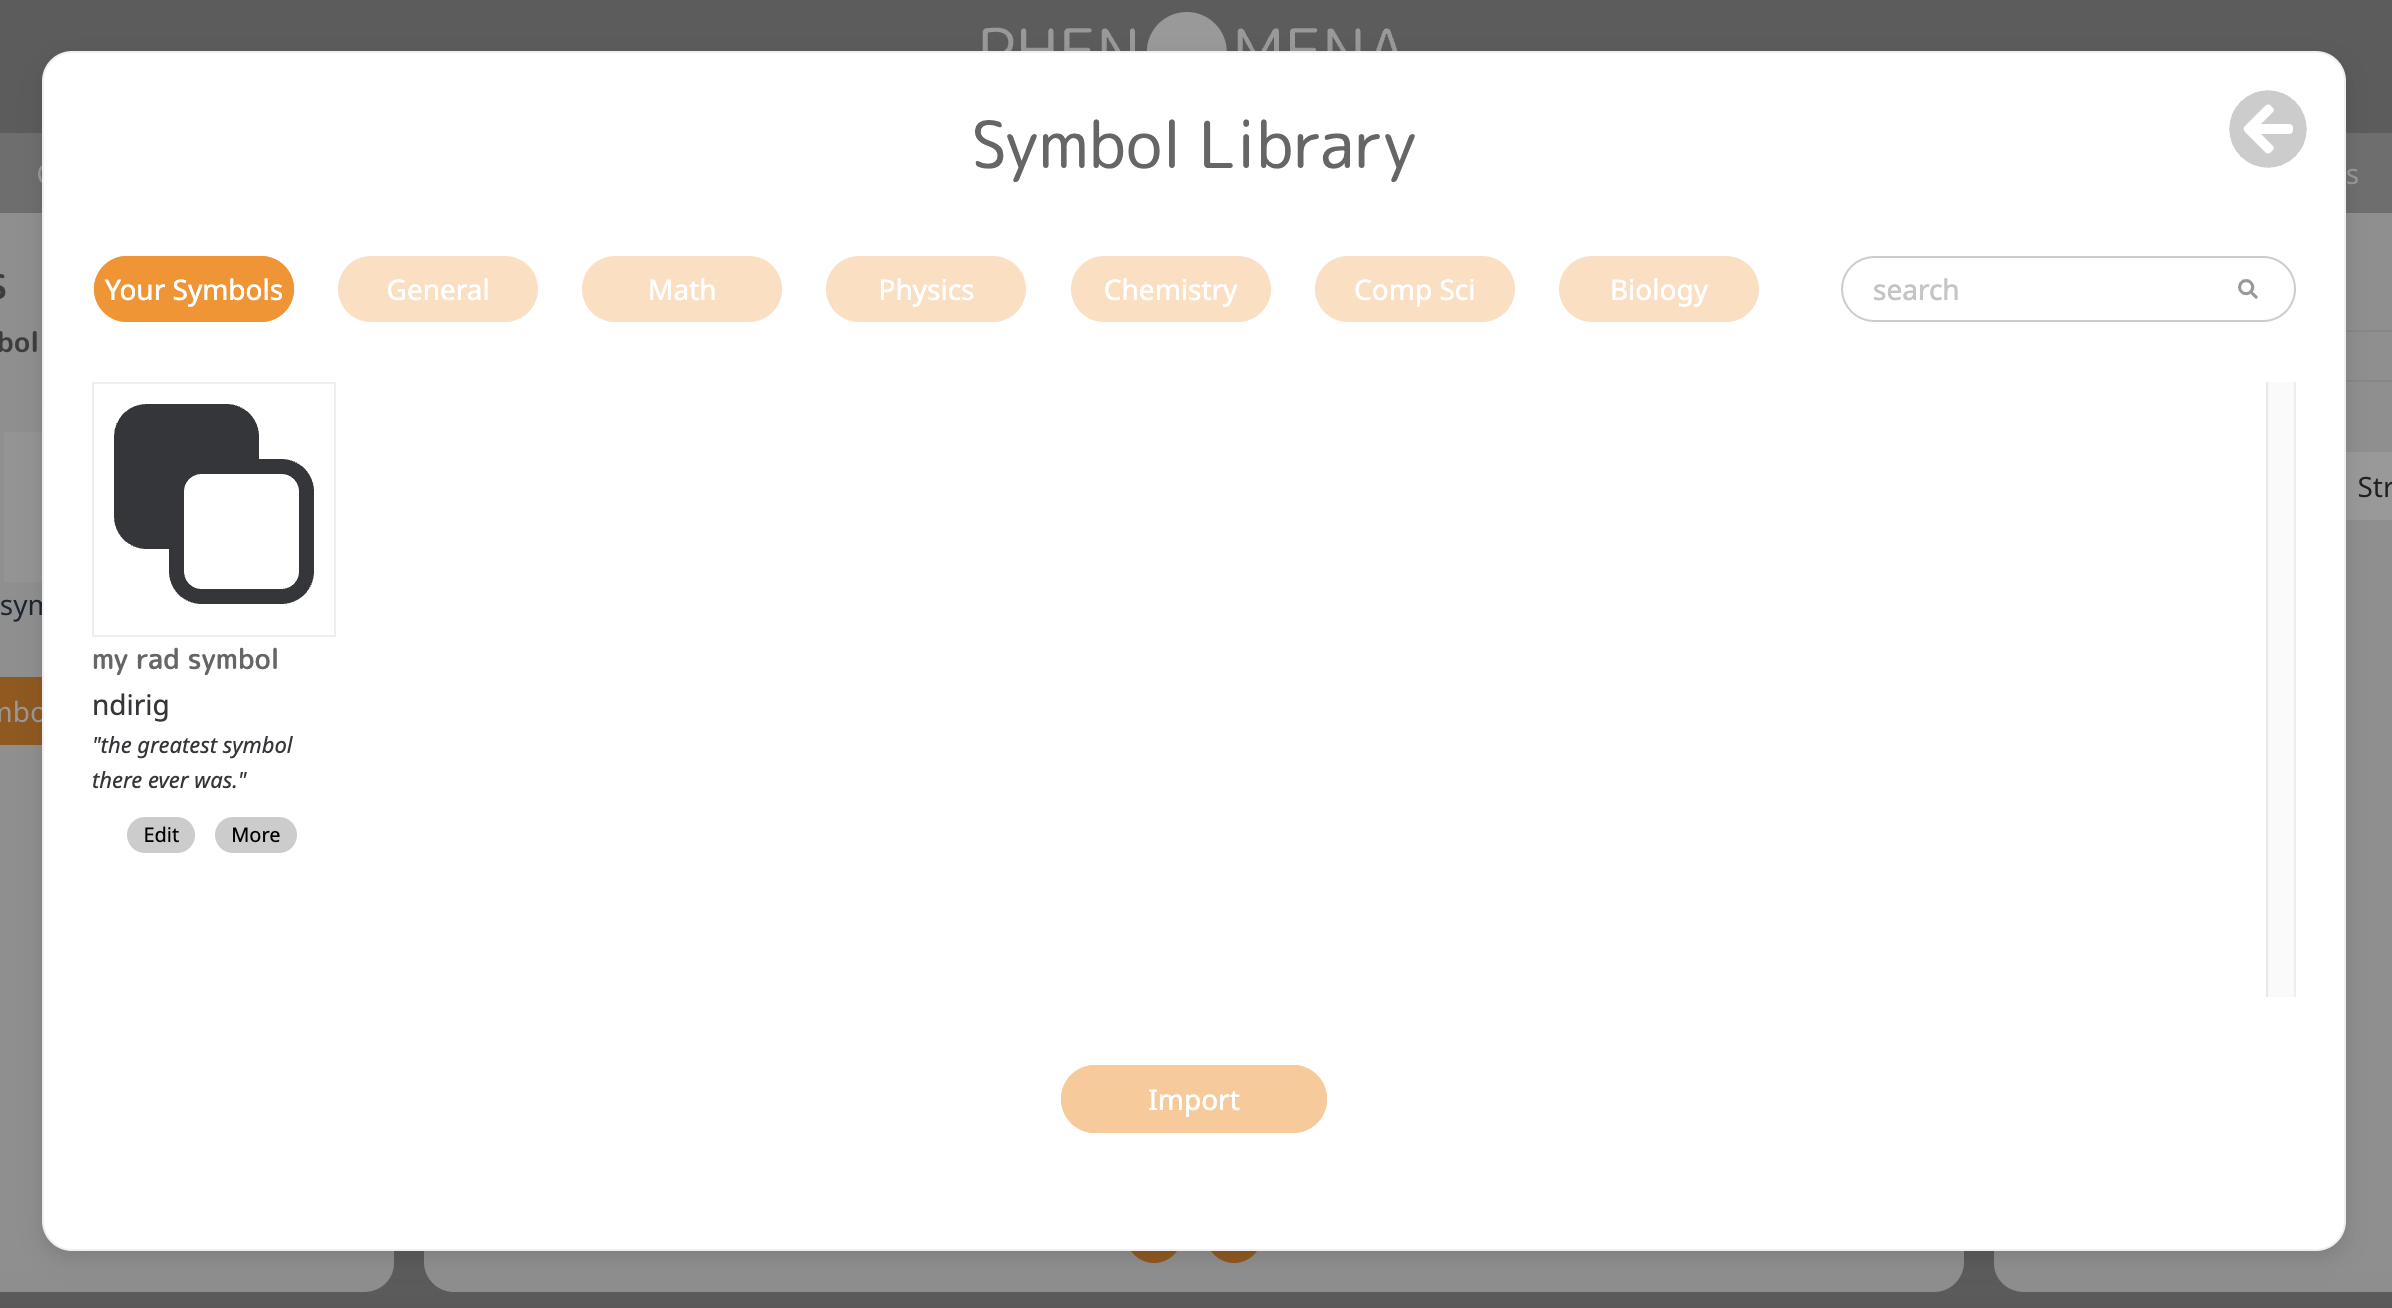
Importing From the Symbol Library
Creators can upload symbols to a public library so that other creators can use them. You can browse the Symbol Library by navigating to the Symbols tab and hitting “Import Symbol”. Symbols are grouped by subject and can be searched via query. Once you’ve selected a symbol, hit “Import” to add it to the scene. You may make any changes you like to an imported symbol once it’s in your scene.
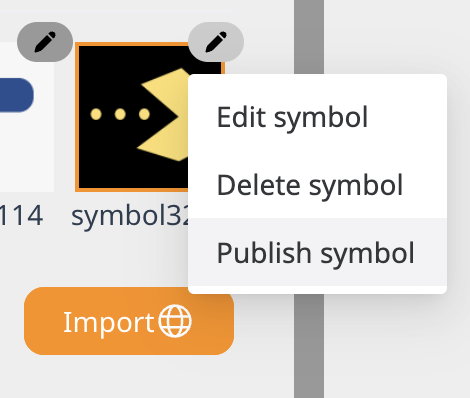
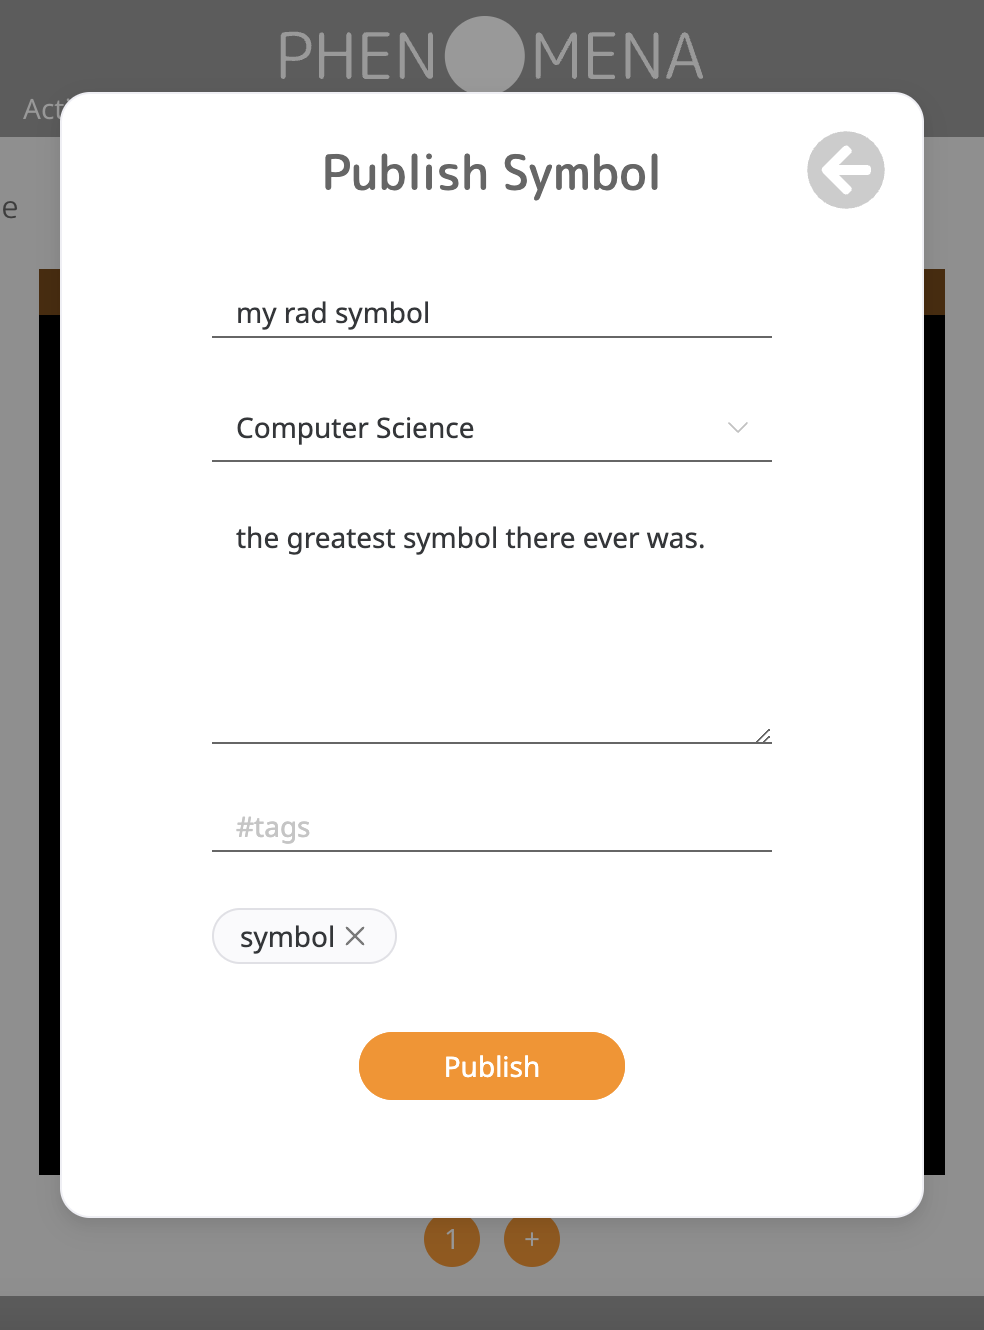
Uploading to the Symbol Library
If you have a symbol you want to share with other creators, click the pencil icon and hit “Publish Symbol”. Fill in some information about your symbol and hit “Publish”.
Menu Bar Actions
Uploading a Custom Graphic
In addition to all the images in the Phenomena Graphics Library, creators can also upload their own images. In the menu bar, click “Create”, then “Insert SVG”. These images must be SVG files (vector-based graphics). To create your own SVG graphics, we recommend using Figma or any other illustration software that allows you export SVGs. You can also browse SVG Repo for additional graphics.
Adding Interactive Controls
Creators can add interactive sliders, buttons, switches, and arrows from the “Create” menu. By themselves, these controls don’t do anything, but using the code editor, you can easily make them control another object’s properties in real time. See the section Adding Functionality to Sliders, Buttons, Etc.
Adding a Drawboard
A drawboard is a blank canvas that allows you to draw dynamic graphics using code. You can create a drawboard from the “Create” menu. See also Using Drawboards.
Duplicate a Frame
A creator can duplicate a frame from the “Actions” menu. Creators can achieve similar functionality by using symbols. In general, we recommend using symbols over frame duplication anytime you need to reuse code on multiple frames. Using symbols instead will ensure that any changes to the code need to be made only once, rather than on every frame.
Adding a Caption
You can add a caption to the selected frame by clicking “Create”, then “Create Top Text”. We recommend you keep captions to three lines or less.
Cut, Copy, and Paste
If you select an object and open the “Edit” menu in the menu bar, you can cut, copy, and paste that object. A pasted object will retain the properties and code of the original object.
Note: this is an experimental feature. References to properties and external objects in code may not transfer, especially if the object is pasted to another frame. Save before pasting, and use with discretion.
Saving a Project Snapshot
A project snapshot is a thumbnail image that is shown in the Experience browser. To save a project snapshot in the Creator Tool, click “File” in the menu bar, then “Save Project Thumbnail”.
Code Editor Basics
Creators can add interactive behavior to their Experiences using the Phenotype block-based visual programming language. Phenotype is a drag-and-drop based system that is built to cater to inexperienced coders and experts alike.
Phenotype allows you to change the property values of objects. This can be used to:
Move objects across the screen
Make objects bigger or smaller
Perform a calculation based on the values of multiple properties, then show the result of the calculation on screen
Determine if one object has collided with another
Show or hide objects based on certain conditions
Much, much more!
Getting Started With Events

Let’s say you want to adjust the position of an object with code. Ask yourself – when do you want this code to run? This is where events come in. An event describes when a block of code should be run. For example, the code inside an onLoad event is run only once, when the Experience is first loaded. Here is the complete list of events:
onLoad – code that is run only once when the Experience is first loaded
Possible use case: setting the initial position of an interactive element
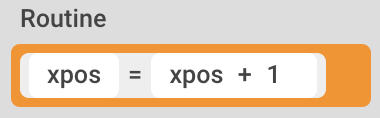
onFrame – code that is run on every browser animation frame (around 60 frames per second)
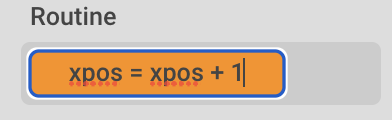
Possible use case: incrementing the x-position by 1 pixel every frame so that the object moves across the screen
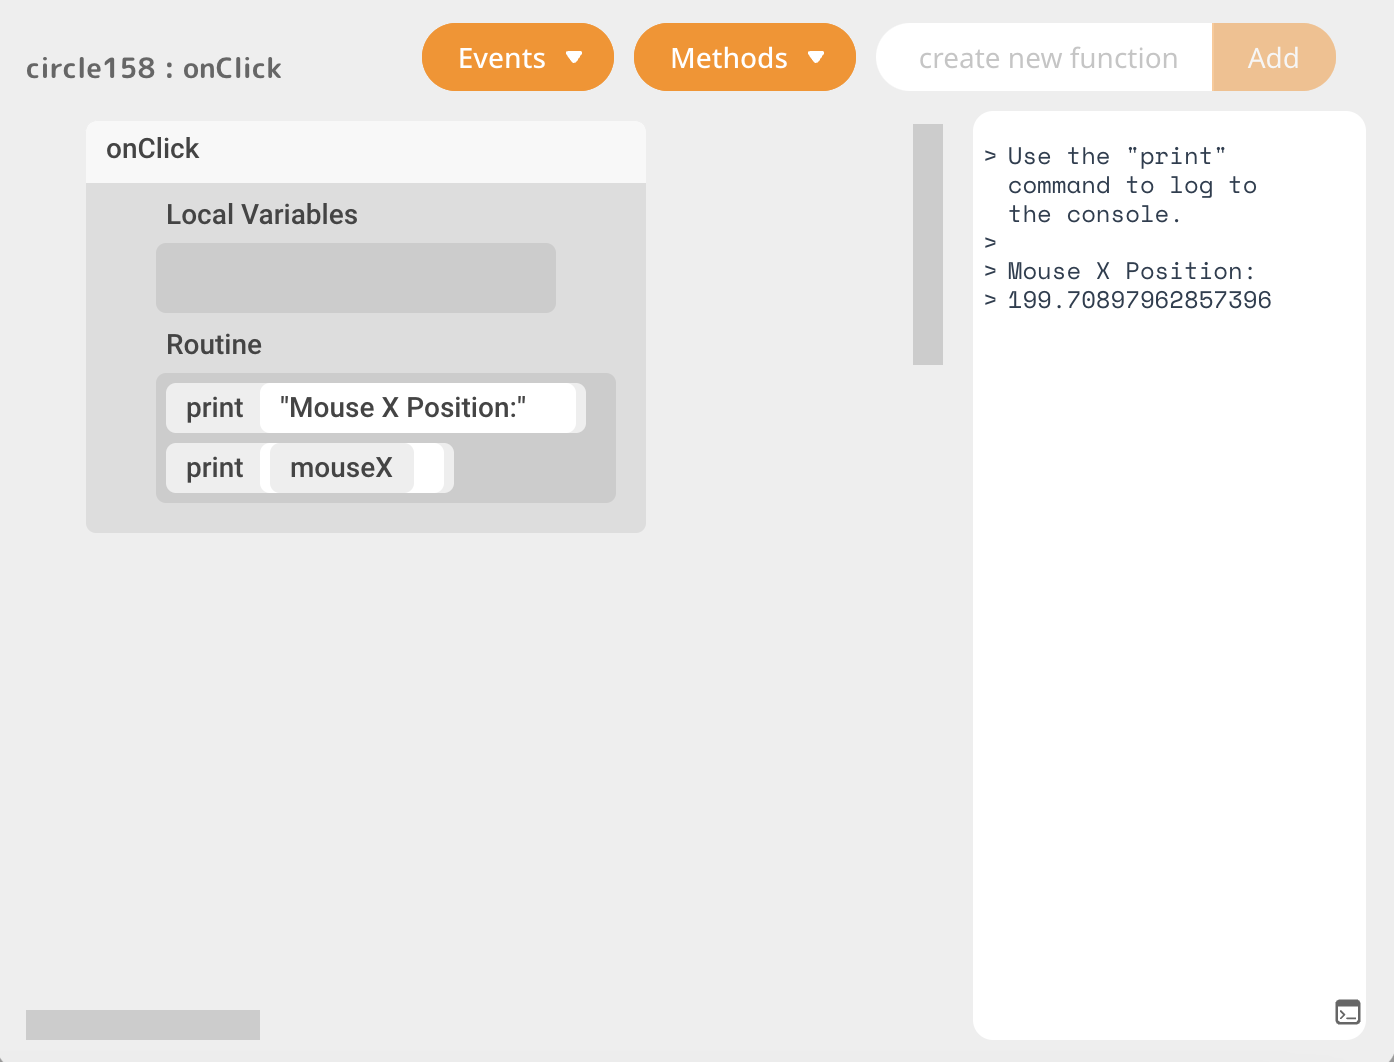
onClick – code that is run when the object is mouse button is pressed
Possible use case: a button that displays a message once it’s clicked
onDrag – code that is run when an object is dragged during runtime (its draggable property must be true)
Possible use case: a wiggling animation when an animal graphic is clicked and dragged
onRelease – code that is run the mouse button is release
Possible use case: performing a calculation after a dragged graphic is let go
onChange (sliders only) – code that is run when a slider value is changed
Possible use case: make an “Submit” button visible when a slider is adjusted
Local Variables
Local variables are variables that can only be used inside its parent event or method. In other words, you cannot access them in another event, method, or object, unlike properties. Local variables can be used to keep track of calculated values that need to be used multiple times in a Routine.

The Routine Block
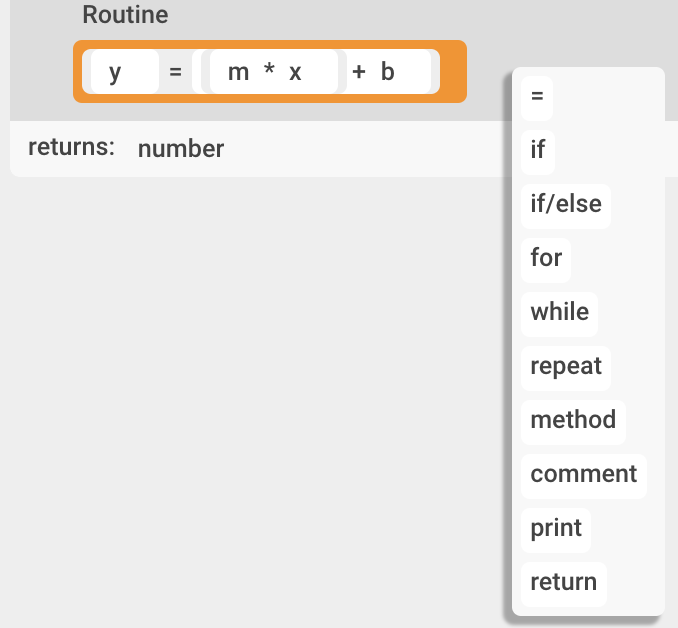
The Routine block appears in every event and custom method. This is where you write your code. When you click in the Routine block, a number of options will appear. Click one to add that type of block to the Routine.

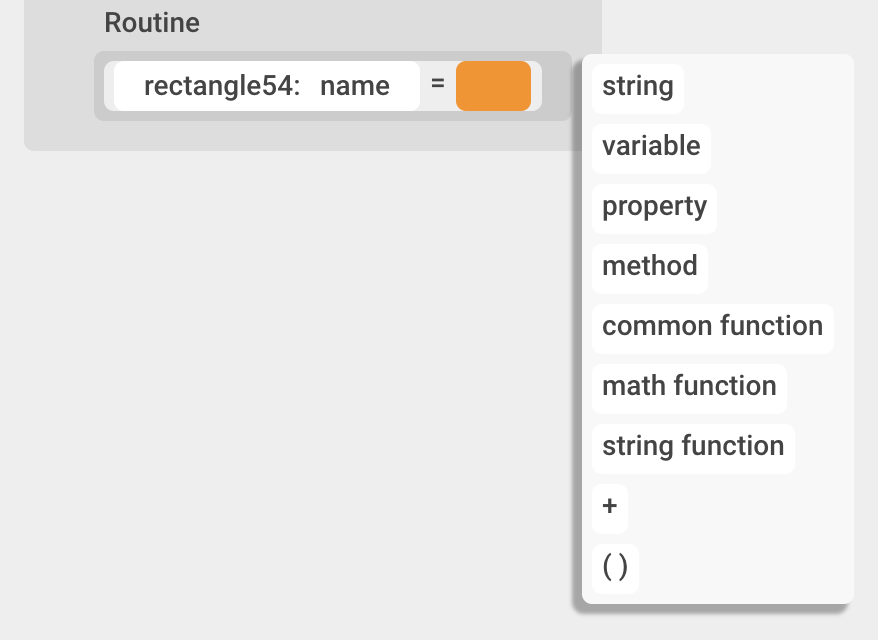
= (assignment operator)
The assignment operator block is a single line where you can set the value of a local variable or property. You can assign the value of properties in other objects, even those in other frames.
Note: You cannot access the properties of objects that exist within symbol instances. But fear not – see the section Coding With Symbols.
You can set the value of the local variable or property to equal a static value (such as “hello”, 3, or false). You can also set it equal to the value of another property/variable, the returned value of a method or function, or an expression block (denoted by parentheses).
Note: if, for instance, you attempt to set a number property equal to a text value, Phenotype will throw a “type error”, indicated by red highlighting. This simply means that the variable was expecting a certain type of value (a number), but received another type instead (a string).


if and if/else
These blocks run code if a given condition is true. This condition could be a simple boolean property/variable, or the result of a comparison between two values.
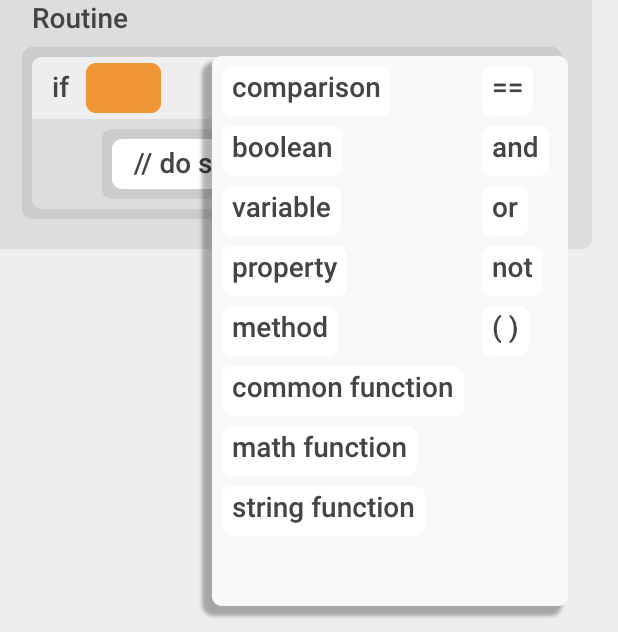
With a comparison block, you can check to see if two values are equal (or not equal), or whether one is greater than or less than another.

For if/else blocks, anything in the “else” section will be run if the condition is false.

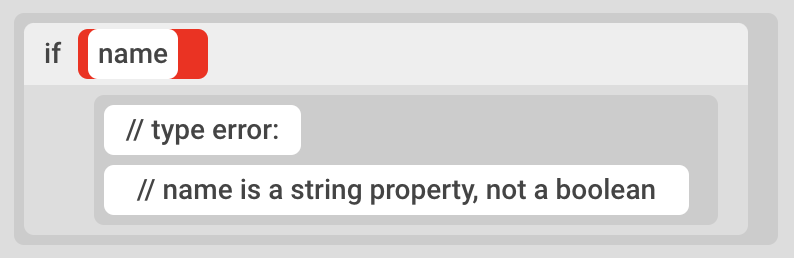
If the condition in the if block is not a boolean (true/false) value, Phenotype will throw a “type error”, as indicated by red highlighting.
repeat
Code inside a repeat block is repeated a specified number of times.

for
The for block is a looping block that takes three parameters. It first needs a variable (or “index”) to increment (to keep track of the number of loops). The second parameter sets the initial value of the index variable, and the third parameter specifies how many times to repeat the code inside the block and increment the index by one. In other words, the code inside the for loop will be repeated as long as the index is less than the third parameter.
In traditional programming languages, for loops are often useful for iterating through arrays. Arrays are not yet a feature in Phenotype, but they will be soon!

while
Code inside a while block is run repeatedly while a certain condition is met.
Watch out for infinite loops! In general, use of the while block is rare. This block should not be used for animation purposes – write your code in an onFrame event instead.

method
This block is used to call custom methods. See the section Custom Methods.
comment
A comment is not a line of code that is run – rather, they are completely ignored during runtime. Comments are little notes that coders can leave for themselves to remember what a block of code is doing, or how it works.

The print command does not display a message to the viewer of the Experience – rather it prints a message to the Debug Console (which is only viewable by the Experience developer). The purpose of printing to the Debug Console is to check what the values of variables and properties are at runtime. This is very useful for tracking down bugs in your Experience.
Custom Methods
In addition to events, you can also write code inside a custom container called a “method”. You can then call the method from inside an event. Custom methods are great if you need to use a few lines of logic multiple times, or if you want to organize your code into small, independent tasks for better readability.
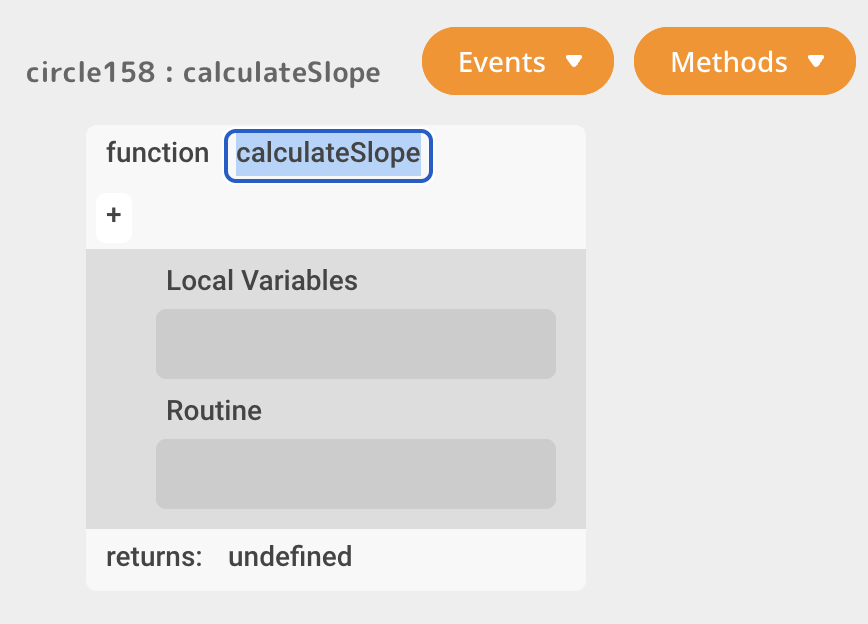
Creating a Custom Method
To create a custom method, simply enter a method name into the input on the right, and hit “Add”.
Your new blank method will be displayed immediately upon creation. Here you can write code just like you would in an event.


Renaming a Custom Method
You can edit the name of a custom method by simply double clicking on the title in the method block.
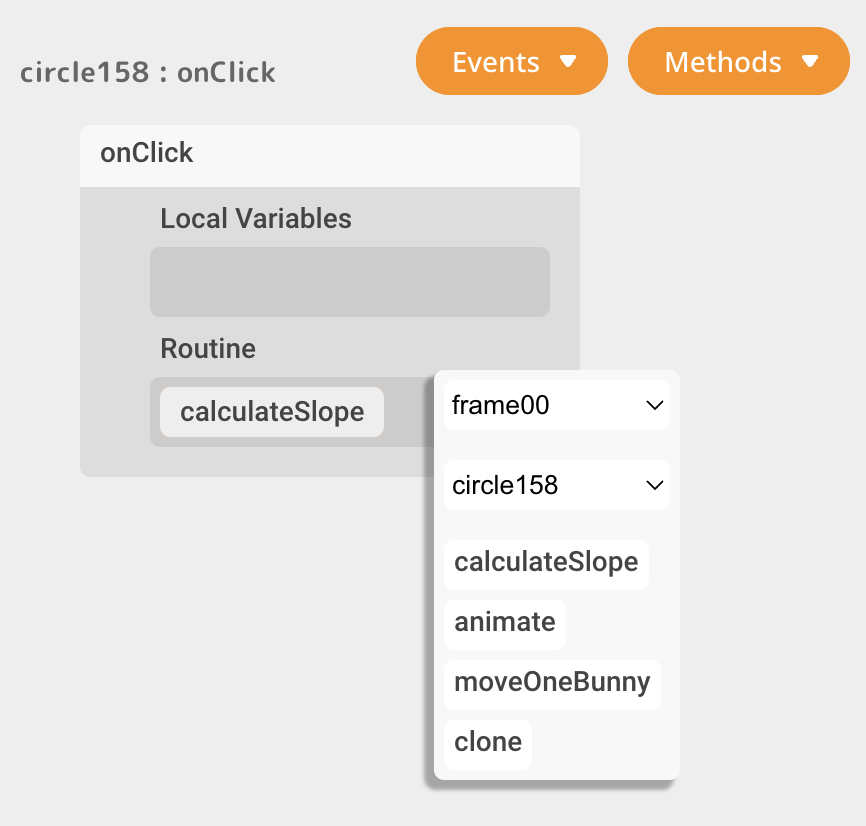
Running a Custom Method
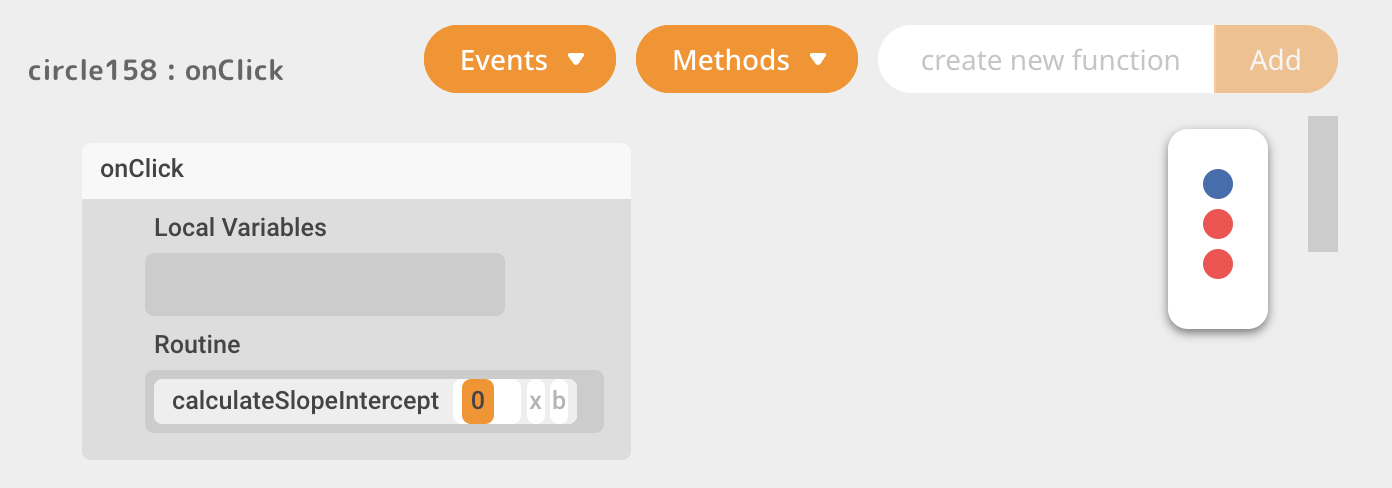
To call a custom method, simply navigate to an event (or even another method), and add a line of code in the Routine, then hit “method”. You can call methods that exist both inside and outside the current object.
Parameters
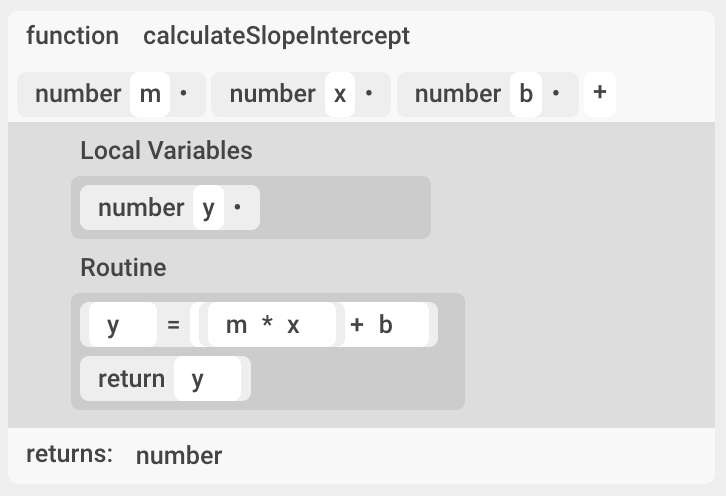
Say you want to create a method that handles a slope intercept calculation. You want to calculate y based on given values for m, x, and b. You can pass in these m, x, and b values to your custom method with parameters.
To add a parameter to a custom method, simply hit the plus button at the top of the method block. You can select the type of value the parameter should take in (such as number or string).


Return value
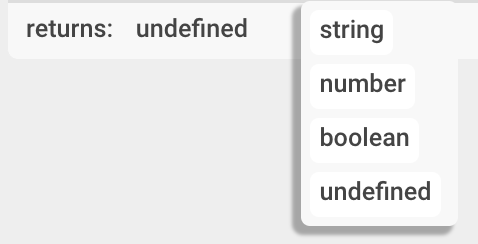
You may often want a custom method to spit out (or “return”) an output. In our slope intercept, example, we want to return the value of y.
First, we need to set the “return type”. This tells the method what kind of value it should return (whether it’s a number, string, or boolean). In our slope intercept example, we want to return a number.
Next, we need to specify what value is being returned by the function. Add a “return” block to your Routine and insert a variable to be returned (in our case, “y”).
The Error Log
If your code has errors in it when you run your Experience, an error log will appear in the top left corner of the code pane. Click on each of the red dots to see where an error occurred and what you need to do to fix it.
Once an error has been resolved, it will change color.


The Debug Console
The purpose of printing to the Debug Console is to check what the values of variables and properties are at runtime. This is very useful for tracking down bugs in your Experience.
Click the console icon in the lower right corner to toggle the Debug Console.

Free-Type Mode
Phenotype is primarily a drag-and-drop programming environment, but you can also type your code out. Select a Routine block and hit enter to begin Free-Type mode. Type a line of code and then hit enter, and Phenotype will try its best to convert your text into code blocks. Hit enter again to type a new line.
You can use dot notation (such as “circle154.name”) to reference the property of an object.
Note: this is an experimental feature that may cause unexpected behavior and bugs. Use with discretion.
Example: Adding Functionality to Sliders, Buttons, Etc.
Let’s say you want to control the width of a rectangle with a slider. Create a slider and navigate to its onFrame event in the code editor. Simply add a line to the Routine that sets the width of the rectangle equal to the value of the slider.

Now set the minimum and maximum value of the slider in the Properties tab.
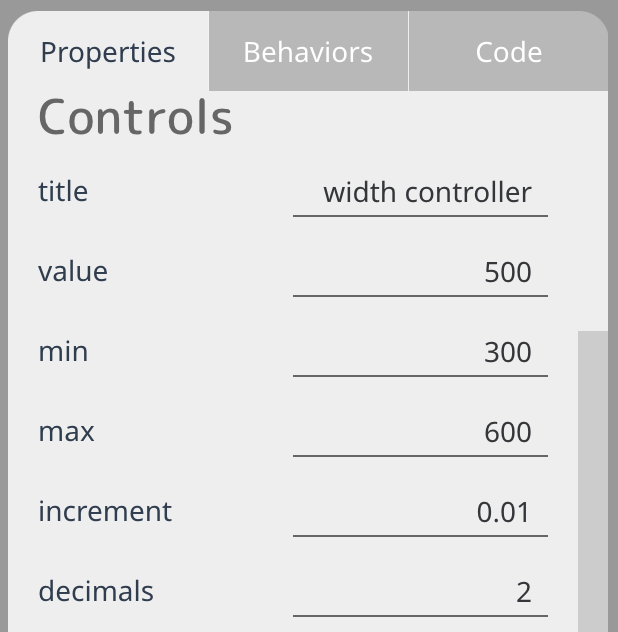
And voila! You can control the width of the rectangle with the slider.

Example: Using Drawboards
A drawboard is a blank canvas that you draw dynamic graphics on using code. Drawboards are great for graphs and anything requiring dynamic animations. Let’s draw some rectangles on a drawboard just to get a taste of what it can do.
Create a drawboard and navigate to its onFrame event. In the Routine block, select “method” to see a list of drawing methods you can use on a drawboard.
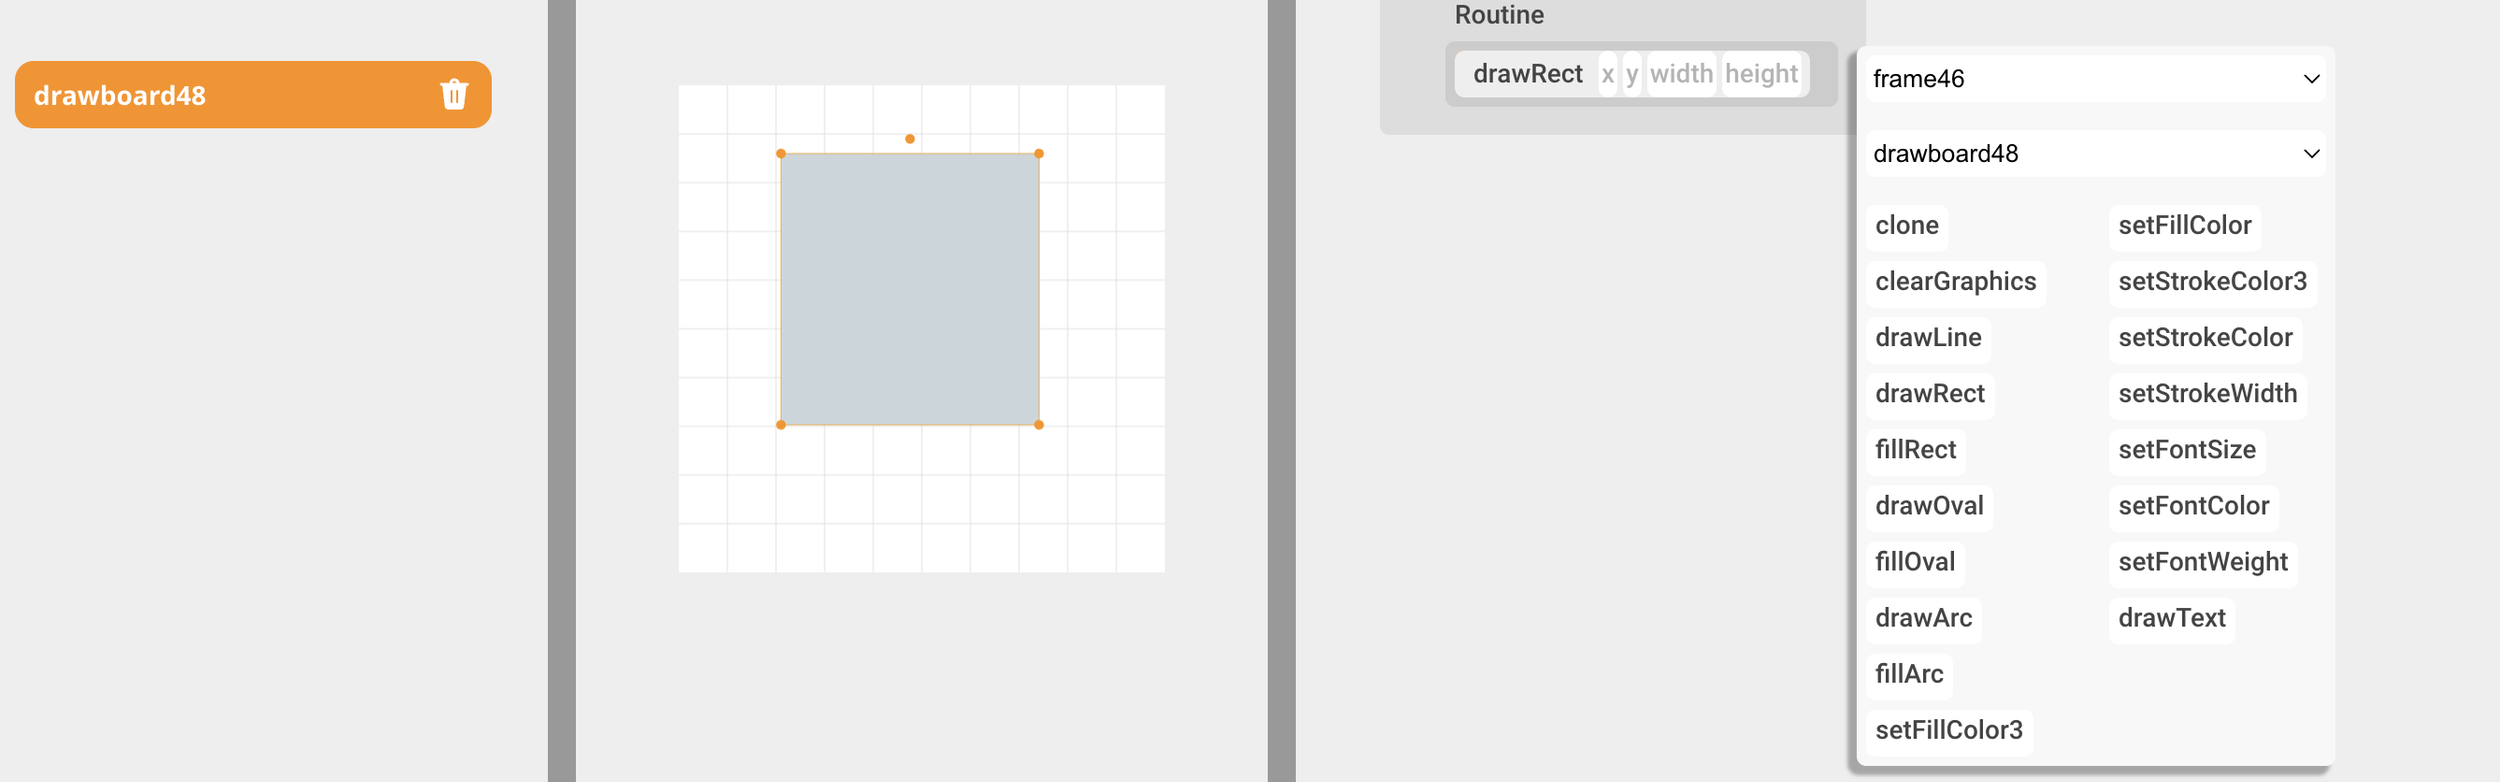
A drawboard is secretly just an HTML Canvas object. You can learn how all these methods work by reading documentation for HTML Canvas here.
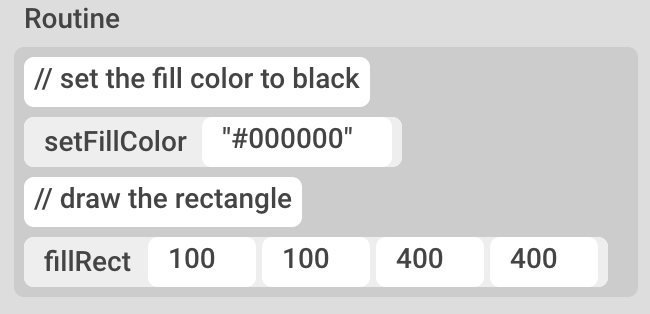
For now, let’s just draw a rectangle. Set the fill color first, then call fillRect.
And there you have it! You’ve drawn a black rectangle on the drawboard.

Example: Coding With Symbols
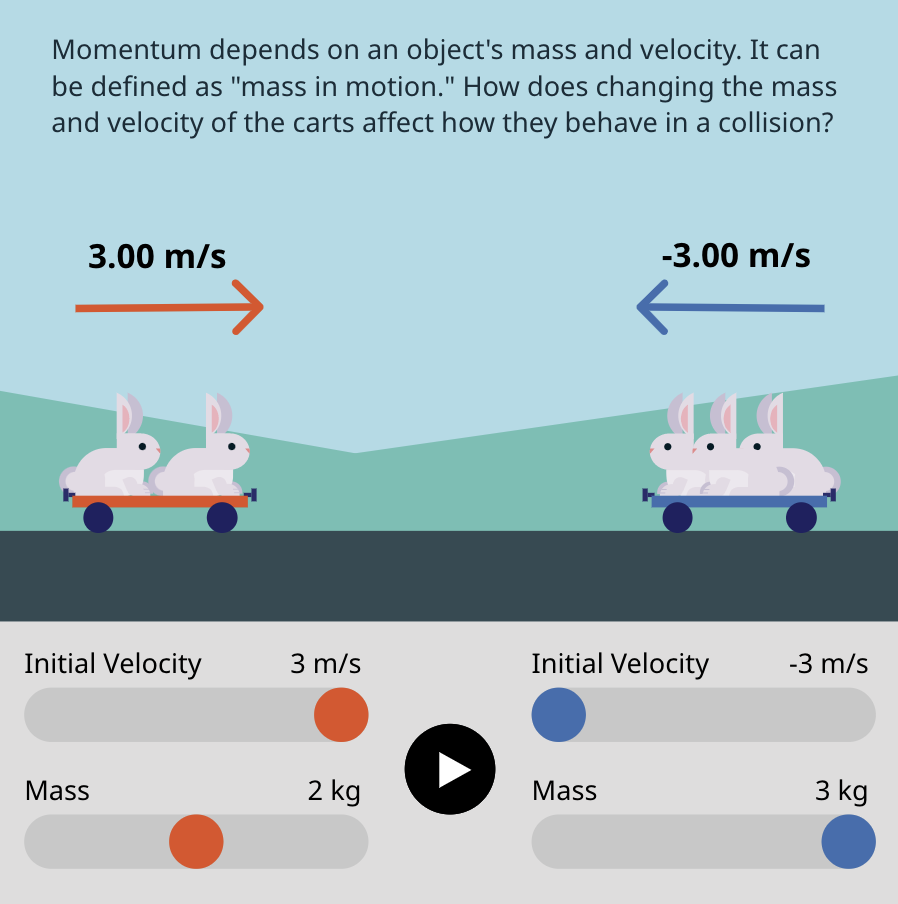
Say you have a symbol containing bunnies on top of a cart. You want to control the number of bunnies on the cart from code outside the symbol (such as a slider in the main scene). However, the Creator Tool does not allow you to access the properties of objects that exist within symbol instances. How, then, can you control the number of bunnies on the cart?
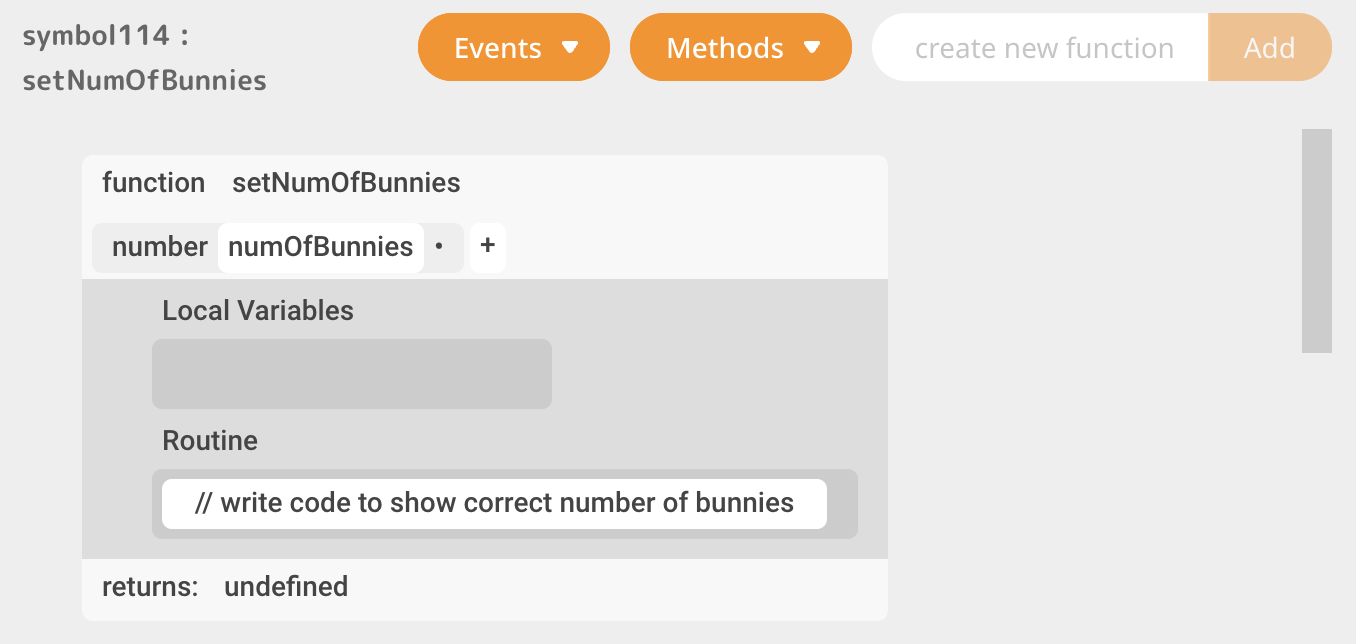
Never fear – you can achieve this functionality using custom methods in the symbol. Select your bunny cart symbol and add a method called “setNumberOfBunnies”.
Note: make sure you select the symbol, not the frame in the symbol! Double click the symbol in the symbols pane to ensure it’s selected.
Add a number parameter to the method called “numOfBunnies”. Now write the code to show the correct number of bunnies, based on the parameter you pass in.
Now let’s hook this up to a slider that will control the number of bunnies. Create a slider in the main scene and call it “Mass”. In the onChange event of the slider, call the “setNumOfBunnies” method you created in the bunny cart symbol.
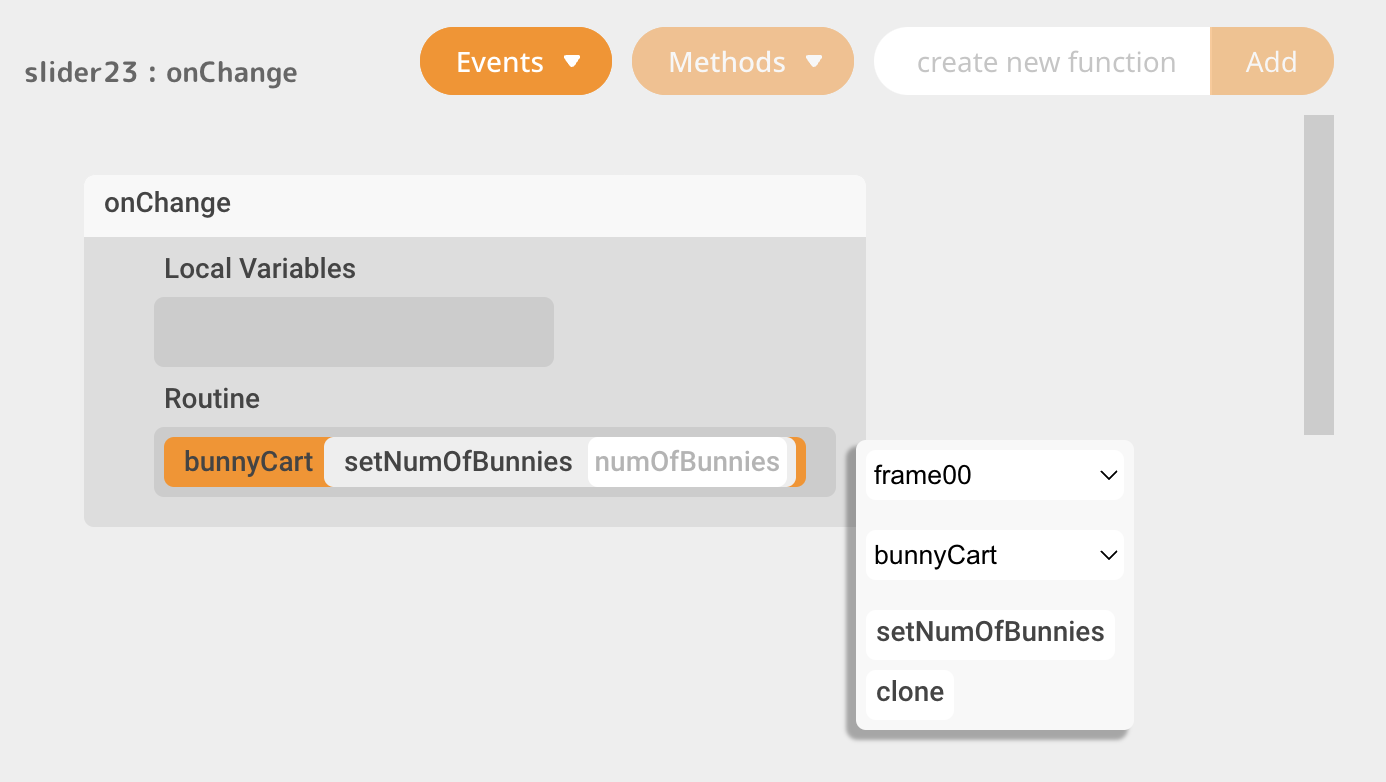
Pass in the value of the slider as the parameter for the “setNumOfBunnies” method. And voila! You can now control the number of bunnies on the cart from outside the symbol.
Code Editor Keyboard Shortcuts
minus (-)
Zoom out code pane
plus (+)
Zoom in code pane
enter
Create free-type block (when Routine block is selected)
cmd+backspace
Delete a selected variable block
cmd+x
Cut a line of code
cmd+c
Copy a line of code
cmd+v
Paste a line of code